Installing Wine on Linux Mint 22
This comprehensive guide walks you through installing and configuring Wine properly on Linux Mint 22. While Ubuntu 24.04 LTS shares many similarities with Mint, I’ll have a dedicated guide for Ubuntu since there are specific differences in prerequisites, GPG key handling, repository codenames, and system configuration.
Wine needs no introduction for most Linux users seeking to run Windows applications. If you’ve found this guide, you already know what Wine does and why you need it. So let’s just skip the marketing pitch and get straight to setting things up correctly.
After completing this installation, you should also follow my upcoming guide on setting up DXVK within your Wine prefix to maximize gaming performance. DXVK enables Vulkan-based DirectX translation, dramatically improving frame rates for Windows games on Linux. I’ll cover everything including troubleshooting compatibility issues on older GPUs like the GT 750M. Stay tuned for that!
By the way, if you’re also looking to handle compressed archives on Linux, you can technically run the Windows version of 7-Zip through Wine. However, 7-Zip now provides an official native Linux build that works better and integrates more smoothly with the system. I’ve written a complete guide on installing native 7-Zip on Linux if you want powerful archive management without Wine’s overhead.
Now, let’s get Wine installed and configured properly!
Step 1: Prepare Your System and Install Prerequisites
Start by updating your system repositories and packages:
sudo apt update && sudo apt full-upgrade -y
Enable 32-bit Architecture Support
Wine requires 32-bit library support even on 64-bit systems because many Windows applications still use 32-bit executables. Check whether your system already has i386 architecture enabled:
dpkg --print-foreign-architectures
If the output shows i386, you’re already set. If nothing appears or you don’t see i386, enable it:
sudo dpkg --add-architecture i386
Verify your hardware architecture:
uname -m
Expected output for most modern systems: x86_64 or amd64.
Install Required Packages for WineHQ Repository
Linux Mint requires specific prerequisite packages before adding the WineHQ repository. Execute this exact command:
sudo apt install dirmngr ca-certificates software-properties-common curl wget -y
For those curious, here’s what each package does:
dirmngrmanages certificate revocation lists for GPGca-certificatesprovides trusted certificate authoritiessoftware-properties-commonenables PPA managementcurlandwgethandle secure file downloads
Note for Ubuntu users: Ubuntu requires a slightly different package set (gnupg, lsb-release instead of just dirmngr). As mentioned earlier, I’ll have a separate Ubuntu-specific guide since mixing instructions between Mint and Ubuntu can cause repository signature failures and other subtle issues. This guide focuses exclusively on Linux Mint to ensure everything works correctly.
Step 2: Import the WineHQ Repository
Download and Install WineHQ GPG Signing Key
GPG keys verify that packages you download actually come from WineHQ and haven’t been tampered with. First, create the keyrings directory if it doesn’t exist:
sudo mkdir -p /usr/share/keyrings
Download the WineHQ GPG key and convert it to the proper format:
curl -fsSL https://dl.winehq.org/wine-builds/winehq.key | sudo gpg --dearmor -o /usr/share/keyrings/winehq.gpg
Important: Linux Mint uses /usr/share/keyrings for GPG keys, while Ubuntu typically uses /etc/apt/keyrings. This distinction matters. Using the wrong path causes signature verification to fail, and APT will refuse to install packages from the WineHQ repository.
Next, verify the key was imported successfully:
ls -l /usr/share/keyrings/winehq.gpg
Example output showing the key file with proper permissions:
-rw-r--r-- 1 root root 2313 Dec 22 23:34 /usr/share/keyrings/winehq.gpg
Determine the Correct Ubuntu Codename
Here’s the things: Linux Mint is based on Ubuntu, but WineHQ repositories use Ubuntu codenames rather than Mint codenames. Running lsb_release -cs (or more details with lsb_release -a) on Mint returns Mint-specific codenames like wilma, xia, vanessa, or zara. WineHQ doesn’t have packages for these names, which causes repository errors.
To find the Ubuntu codename your Mint installation is based on, use the UBUNTU_CODENAME variable from /etc/os-release:
grep UBUNTU_CODENAME /etc/os-release
# or
grep UBUNTU_CODENAME /etc/os-release || lsb_release -cs
For Linux Mint 22.2, the output shows:
UBUNTU_CODENAME=noble
You can also view complete system identification information:
cat /etc/os-release
Expected output for Linux Mint 22.2:
NAME="Linux Mint"
VERSION="22.2 (Zara)"
ID=linuxmint
ID_LIKE="ubuntu debian"
PRETTY_NAME="Linux Mint 22.2"
VERSION_ID="22.2"
HOME_URL="https://www.linuxmint.com/"
SUPPORT_URL="https://forums.linuxmint.com/"
BUG_REPORT_URL="http://linuxmint-troubleshooting-guide.readthedocs.io/en/latest/"
PRIVACY_POLICY_URL="https://www.linuxmint.com/"
VERSION_CODENAME=zara
UBUNTU_CODENAME=noble
Notice two codenames: zara is the Mint 22.2 codename, but noble is what we need for WineHQ. If you’re running Mint 22.3, you’d see zena as the Mint codename, but the Ubuntu codename would still be noble since all Mint 22.x releases are based on Ubuntu 24.04.
Now we can proceed to add the repository with the correct codename.
Add the WineHQ Repository
For Linux Mint 22.x based on Ubuntu 24.04 (Noble Numbat), paste this entire block into your terminal:
cat <<EOF | sudo tee /etc/apt/sources.list.d/winehq.sources
Types: deb
URIs: https://dl.winehq.org/wine-builds/ubuntu/
Suites: noble
Components: main
Signed-By: /usr/share/keyrings/winehq.gpg
EOF
For Linux Mint 21.x (Vanessa, Vera, Victoria, Virginia) based on Ubuntu 22.04 Jammy:
cat <<EOF | sudo tee /etc/apt/sources.list.d/winehq.sources
Types: deb
URIs: https://dl.winehq.org/wine-builds/ubuntu/
Suites: jammy
Components: main
Signed-By: /usr/share/keyrings/winehq.gpg
EOF
This command creates a new APT source file using the modern DEB822 format (the .sources extension). This format is cleaner and more maintainable than the older one-line format you might see in legacy guides.
Now, verify the repository file was created correctly:
cat /etc/apt/sources.list.d/winehq.sources
Then update your package lists so the system recognizes the WineHQ repository:
sudo apt update
Look for this line in the output confirming the repository was added successfully:
Get:1 https://dl.winehq.org/wine-builds/ubuntu noble InRelease [4,947 B]
Or:
Hit:5 https://dl.winehq.org/wine-builds/ubuntu noble InRelease
If you see errors about GPG signatures or repository authentication, double-check that you used the correct keyring path (/usr/share/keyrings/winehq.gpg) and the correct Ubuntu codename for your Mint version.
Step 3: Install Wine on Linux Mint 22
All the preparation is complete. Now we can install Wine itself.
WineHQ provides three release branches: Stable Branch (winehq-stable), Staging Branch (winehq-staging), and Development Branch (winehq-devel). Each serves different purposes depending on your needs.
Stable Branch receives the most thorough testing before release and offers the highest reliability. This is the recommended choice for production use and everyday Windows applications. Stable updates arrive less frequently but prioritize stability over cutting-edge features.
Staging Branch includes experimental patches and features that haven’t yet been merged into the main development tree. These features often improve compatibility with specific games or applications. Staging is more bleeding-edge than Stable but generally remains quite usable.
Development Branch represents the absolute latest code from Wine’s development tree. New features appear here first, but this branch can be unstable and is primarily intended for developers and testers.
For most users, Stable Branch is the right choice:
sudo apt install winehq-stable --install-recommends
The --install-recommends flag ensures Wine installs all recommended supporting packages, which improves application compatibility.
For Staging or Development branches, replace winehq-stable with winehq-staging or winehq-devel respectively.
Verify the installation by checking the Wine version:
wine --version
As of this writing, the output shows:
wine-11.0
Your version might be newer depending on when you’re reading this guide. Wine releases major versions roughly every two weeks for Development branch, with Stable releases every few months after extensive testing.
List the contents of the default Wine prefix directory:
ls -la ~/.wine
Here, if you see directories like dosdevices and drive_c, Wine installed successfully. These directories form the virtual Windows environment where applications will run.
Step 4: Configure Wine Environment and Install Essential Runtimes
After installing Wine, two additional runtimes significantly improve application compatibility. Wine Mono enables .NET Framework applications, while Wine Gecko provides HTML rendering for applications with embedded web browsers or help systems.
Initialize your Wine prefix to trigger the runtime installation prompts:
winecfg
The Wine configuration window opens, and Wine prompts you to install Mono first, followed by Gecko. Click Install for both prompts to add these essential components.

wine-mono) ensures proper support for Windows applications that depend on the .NET Framework.
Verifying Runtime Installation
After the installations complete, verify that Mono and Gecko exist within your Wine prefix:
ls ~/.wine/drive_c/windows/mono
ls ~/.wine/drive_c/windows/system32/gecko
Expected output showing the current versions:
mono-10.4.1
2.47.4
However, you might see different output like this:
# Mono
mono-2.0
# Gecko
plugin
Don’t panic if you see these directory names. The mono-2.0 directory (~/.wine/drive_c/windows/mono/mono-2.0) doesn’t indicate an old version. It’s actually the .NET 2.0 assemblies directory that exists regardless of which Wine Mono version you have installed. The folder name reflects the .NET Framework version it targets, not the Wine Mono installer version.
Deep Verification of Runtime Versions
To definitively verify which runtime versions are actually installed, use these commands:
ls -lh ~/.cache/wine || true
ls -lh ~/.cache/wine/*mono* ~/.cache/wine/*gecko* 2>/dev/null || true
grep -i "wine-mono" ~/.wine/*.reg ~/.wine/system.reg 2>/dev/null || true
ls -l ~/.wine/drive_c/windows/system32 | grep -i gecko || true
For a visual confirmation, open the Windows-style Add/Remove Programs interface:
WINEPREFIX=~/.wine wine uninstaller
This displays the familiar Windows program list where you can verify that wine-mono and wine-gecko are installed with their correct version numbers.
Manual Runtime Installation (If Needed)
If the runtimes didn’t install automatically, or if you want to install specific versions, you can download them manually. Visit the Void Linux source mirror at https://sources.voidlinux.org/ which maintains archives of Wine runtimes.
Use your browser’s Find function (Ctrl + F) to search for wine-mono or wine-gecko, then download the appropriate versions. Current versions as of this writing:
https://sources.voidlinux.org/wine-mono-10.4.1/
https://sources.voidlinux.org/wine-mono-11.0.0/
https://sources.voidlinux.org/wine-gecko-2.47.4/
Download the MSI installers to a safe location, such as your Downloads (~/Downloads) folder. Before installing new versions, remove the old Gecko directory:
rm -rf ~/.wine/drive_c/windows/system32/gecko
Now, install the downloaded runtimes:
WINEPREFIX=~/.wine msiexec /i ~/Downloads/wine-mono-10.4.1-x86.msi
WINEPREFIX=~/.wine msiexec /i ~/Downloads/wine-gecko-2.47.4-x86.msi
System-Wide Runtime Installation
If you manage multiple Wine prefixes, installing runtimes system-wide prevents Wine from downloading them repeatedly for each new prefix. Copy the MSI files to these system directories:
sudo mkdir -p /usr/share/wine/mono /usr/share/wine/gecko
sudo cp ~/Downloads/wine-mono-10.4.1-x86.msi /usr/share/wine/mono/
sudo cp ~/Downloads/wine-gecko-2.47.4-x86.msi /usr/share/wine/gecko/
So from now, when Wine creates a new prefix, it checks these directories first before attempting to download from the internet. Be cautious with file ownership and permissions when copying files to system directories.
Alternatively, copy the installers to Wine’s cache directory for your user account:
mkdir -p ~/.cache/wine
cp ~/Downloads/wine-mono-10.4.1-x86.msi ~/.cache/wine/
cp ~/Downloads/wine-gecko-2.47.4-x86.msi ~/.cache/wine/
This approach doesn’t require sudo and keeps the installers user-specific.
Refreshing the Wine Prefix
After manually installing or updating runtimes, verify they appear in the program list:
WINEPREFIX=~/.wine wine uninstaller
Then run wineboot to refresh the prefix:
WINEPREFIX=~/.wine wineboot -u
The wineboot -u command updates and normalizes the prefix directory structure, ensuring compatibility with your current Wine version.
wineboot -u.
Step 5: Install Winetricks for Additional Components
Winetricks is an essential helper script that dramatically simplifies installing Windows components, runtime libraries, and fonts within Wine. It automates the complex process of setting up dependencies that many Windows applications require.
Install Winetricks from the Ubuntu repositories:
sudo apt install winetricks
Once installed, Winetricks gives you easy access to hundreds of essential Windows components. For example, install Microsoft Visual C++ runtime libraries:
winetricks vcrun2015 vcrun2019
For gaming, consider installing these additional packages to improve performance and compatibility:
winetricks d3dx9 d3dx10 d3dx11 d3dx11_42 d3dx11_43 dxvk d3dcompiler_43 d3dcompiler_47 ucrtbase2019 corefonts
These components provide DirectX support, shader compilers, the Universal C Runtime, and core Windows fonts that many games and applications expect.
Install Wine fonts package for proper text rendering:
sudo apt install fonts-wine
This package provides basic Windows fonts (Arial, Courier, Times New Roman, etc.) so Windows applications display text correctly when running through Wine.
Step 6: Test Wine Installation
✔️ Verify Wine works correctly by running a simple Windows application:
wine notepad
Right now the Windows Notepad should open in a window on your Linux desktop. If Notepad launches successfully, then your Wine is working properly. You can just close Notepad and proceed to creating isolated Wine prefixes for different applications.
Step 7: Creating Isolated Wine Prefixes
You’ve probably noticed the term “prefix“ appearing throughout this guide. Sure, understanding prefixes is crucial for managing Wine effectively. A Wine prefix is a self-contained directory (like ~/.wine) that holds a complete Windows environment including registry settings, installed applications, and system files. The default ~/.wine prefix supports 64-bit applications by default.
However, some older Windows applications and games only work correctly in a pure 32-bit environment. When you encounter these applications, you need to create a dedicated 32-bit prefix.
Creating a 32-bit Wine Prefix
Let’s create a new 32-bit prefix named .wine32:
export WINEPREFIX=$HOME/.wine32
export WINEARCH=win32
winecfg
The WINEARCH=win32 declaration tells Wine to create a 32-bit-only prefix that cannot run 64-bit applications. Conversely, WINEARCH=win64 creates a 64-bit prefix. The architecture is set during prefix creation and cannot be changed later. If you need to switch architectures, you must create a new prefix.
Verify the new prefix was created:
ls -la ~/.wine32
You should see the familiar dosdevices and drive_c directories, indicating a complete Wine prefix structure.
Understanding 32-bit vs 64-bit Prefix Differences
The key distinction between 32-bit and 64-bit prefixes lies in their directory structure:
32-bit prefixes do not contain a syswow64 directory in ~/.wine32/drive_c/windows. The syswow64 directory (System Windows-on-Windows 64) only exists in 64-bit Windows systems to house 32-bit compatibility files. A true 32-bit prefix will never have this directory.
64-bit prefixes include syswow64 in ~/.wine64/drive_c/windows because they can run both 32-bit and 64-bit applications. The presence of syswow64 confirms you have a 64-bit environment.
For clarity, on a 64-bit Windows system:
C:\Windows\System32→ contains 64-bit system filesC:\Windows\SysWOW64→ contains 32-bit system files
Additionally, 32-bit prefixes only have a single Program Files directory at ~/.wine32/drive_c/Program Files. They never have Program Files (x86) because there’s no distinction between 32-bit and 64-bit programs in a pure 32-bit system.
So, if you see syswow64 in a prefix you intended to be 32-bit, you made a mistake during creation. Delete the prefix and recreate it with the correct WINEARCH setting.
Verifying Prefix Architecture via Command Line
Instead of manually checking directories, you can verify prefix architecture from the terminal:
export WINEPREFIX="$HOME/.wine32"
file "$WINEPREFIX/drive_c/windows/system32/kernel32.dll" 2>/dev/null || true
The output here reveals the architecture:
PE32 executable (DLL) (console) Intel 80386orPE32 executable (GUI) Intel 80386indicates 32-bitPE32+ executable (DLL) (console) x86-64orPE32+ executable (GUI) x86-64indicates 64-bit
This method provides definitive proof of your prefix architecture by examining the actual Windows DLL files Wine created.
Step 8: Managing Environment Variables for Wine Prefixes
Understanding how to properly declare and use Wine environment variables is essential for managing multiple prefixes effectively. The WINEPREFIX environment variable tells Wine which prefix to use for a given command.
Setting WINEPREFIX in Your Current Shell
Environment variable declarations are temporary and only apply to the current terminal tab or window. When you close the terminal or open a new tab, the variable resets.
For example, let’s say you have a dedicated prefix for The Witcher 3 named .wine-witcher3. Set the environment variable:
export WINEPREFIX="$HOME/.wine-witcher3"
The quotes around "$HOME/.wine-witcher3" are technically optional when the path contains no spaces, but using quotes is considered best practice. If your path includes spaces (like "$HOME/Wine Prefixes/Witcher 3"), omitting quotes will cause errors.
Verify the variable was set correctly:
echo "$WINEPREFIX"
Expected output:
/home/kevin/.wine-witcher3
Replace kevin with your actual username. This confirms the environment variable points to the correct prefix.
Running Applications with Specific Prefixes
Once you’ve set WINEPREFIX, run applications within that prefix:
cd "/home/kevin/Games/The Witcher 3/bin/x64"
WINEPREFIX="$WINEPREFIX" wine witcher3.exe
The game launches using the .wine-witcher3 prefix with all its specific settings and configurations.
Important note about gaming performance: Actually, to run demanding games like The Witcher 3 at performance levels comparable to native Windows, you need to configure DXVK within your Wine prefix. DXVK translates DirectX calls to Vulkan, dramatically improving GPU utilization and frame rates.
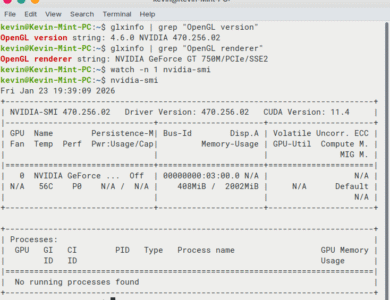
Before setting up DXVK, ensure your GPU drivers are properly installed and configured. If you’re running an NVIDIA GPU — particularly legacy Kepler cards like the GT 750M — check out my guide on installing NVIDIA drivers on Linux Mint 22 and Ubuntu 24.04. Proper GPU drivers are essential for Wine gaming performance, and older NVIDIA GPUs require specific kernel versions to work correctly.
I’ll have a detailed guide covering DXVK setup, including troubleshooting compatibility issues on older GPUs like the GT 750M. Watch for that upcoming post!
Common Pitfalls with Environment Variables
You can also declare the full path directly:
export WINEPREFIX=/home/kevin/.wine-witcher3
📌 However, avoid these common mistakes:
Don’t use quotes with escaped dollar signs:
export WINEPREFIX="\$HOME/.wine-witcher3"
This error frequently happens when using Tab completion while typing a partially complete path. For example, typing export WINEPREFIX="$HOME/.wine-wit and pressing Tab causes the shell to expand it incorrectly with escaped characters.
Don’t use quotes with tilde expansion:
export WINEPREFIX="~/.wine-witcher3"
Wine doesn’t expand the tilde (~) when it’s inside quotes. The shell expands tildes, but only when they’re unquoted.
Do this instead for tilde paths:
export WINEPREFIX=~/.wine-witcher3
Without quotes, the shell correctly expands ~ to your home directory before passing the variable to Wine.
👉 Anyway, before running any application, always verify your prefix path:
echo "$WINEPREFIX"
If the output shows the correct prefix path, your environment variable is properly configured and ready to use.
Step 9: Safely Removing Wine Prefixes
Wine prefixes are completely independent directories. Deleting a prefix directory removes only that prefix entirely without affecting other prefixes or Wine itself. There’s no central registry that will break if you remove one prefix. Just make sure you’re deleting the correct directory.
Listing All Wine Prefixes
If you’ve exported a prefix variable previously, again, verify it:
echo "$WINEPREFIX"
To find all Wine prefixes in your home directory, search for directories containing drive_c (which exists in every valid prefix):
find $HOME -type d -name drive_c -prune -printf '%h\n' 2>/dev/null | sort -u
This command returns absolute paths to all directories containing Wine prefixes.
Note about Steam and Proton: If you have Windows games installed through Steam using Proton, the output will include paths like /.steam/steam/steamapps/compatdata/<appid>/pfx. Proton uses Wine prefixes for its compatibility layer, so these directories also contain drive_c folders. Be careful not to delete Proton prefixes unless you know what you’re doing.

find command to locate all Wine prefixes in the home directory, including Steam Proton compatibility prefixes under compatdata.
Carefully verify the prefix name before deletion to avoid removing the wrong environment.
Ensuring No Processes Are Using the Prefix
Before deleting a prefix, confirm no Wine processes are currently using it. Attempting to delete an active prefix can cause file locks, corruption, or incomplete deletion.
List all active Wine processes:
pgrep -af wine
Example output:
528380 /home/kevin/.steam/debian-installation/steamapps/common/Proton 7.0/dist/bin/wineserver
528387 C:\windows\system32\winedevice.exe
528396 C:\windows\system32\winedevice.exe
Terminating Wine Processes
Kill a specific process by its PID (Process ID):
kill 528380
If a process refuses to terminate with the regular kill command, you can force it using System Monitor. Open System Monitor, search for the PID (like 528396), right-click the process, and select Kill. Alternatively, select the process name and press Ctrl + K to kill it immediately.
To check for processes specifically using files within a particular prefix:
lsof +D $HOME/.wine-witcher3 2>/dev/null || true
The +D option makes lsof recursively search the entire directory tree. This command shows every open file within ~/.wine-witcher3 and which process is using it. The output includes USER, PID, SIZE, NODE, NAME, and full file paths.
If files are being actively used (log files being written, documents open in applications, device busy errors), close those processes before attempting prefix deletion.
Forcefully Stopping All Wine Processes
To stop all Wine processes for the current user (use with caution):
pkill -f 'wine'
Or target a specific prefix:
pkill -f "$HOME/.wine-witcher3"
This kills every process whose command line matches the specified pattern. Be absolutely certain you want to terminate all those processes before running this command.
Deleting the Prefix
Once all processes are stopped and you’ve verified the correct prefix path, delete it:
rm -rf ~/.wine-witcher3
The prefix and all its contents are permanently removed. There’s no recycle bin or undo. Make sure you have backups of any important data before deletion.
Key Takeaways
Let’s consolidate the essential information from this guide:
About Wine installation on Linux Mint:
- Linux Mint 22.x uses Ubuntu 24.04 (noble) repositories, not Mint-specific codenames
- GPG keys go in
/usr/share/keyringson Mint (different from Ubuntu’s/etc/apt/keyrings) - Wine Stable branch (
winehq-stable) is recommended for production use - Wine Mono and Wine Gecko are essential for .NET and HTML rendering
About Wine prefixes:
- Default prefix is
~/.wine(64-bit, can run 32-bit apps via WOW64) - Create dedicated 32-bit prefixes with
WINEARCH=win32for older applications - Prefix architecture cannot be changed after creation
- Each prefix is completely isolated and independent
About prefix management:
- Use
WINEPREFIXenvironment variable to specify which prefix to use - Always verify with
echo "$WINEPREFIX"before running applications - Quote paths containing spaces:
"$HOME/My Games/prefix" - Delete prefixes safely by ensuring no processes are using them first
About essential tools:
- Winetricks simplifies installing Windows components and libraries
wineboot -urefreshes prefix structure (use carefully on established prefixes)wine uninstallershows installed programs in Windows-style interface- DXVK setup (covered in upcoming guide) is crucial for gaming performance
Wrapping Up
You now have a properly configured Wine installation on Linux Mint 22 with the knowledge to manage multiple Wine prefixes effectively. The ability to isolate applications in separate prefixes is one of Wine’s most powerful features, allowing you to maintain clean, stable environments for different applications without conflicts.
Remember that Wine is a compatibility layer, not an emulator. It translates Windows API calls to Linux equivalents in real-time, which means performance can be excellent when everything is configured correctly. However, gaming performance starts with proper GPU drivers. If you’re using NVIDIA hardware, especially legacy cards, ensure your drivers are correctly installed before expecting good gaming results.
For gaming, your next step should be setting up DXVK to enable Vulkan-based DirectX translation. This single addition can transform barely playable games into smooth, enjoyable experiences. I’ll have that guide ready soon with detailed troubleshooting for various GPU configurations.
The Wine project continues active development with new features and improved compatibility arriving regularly. Keep your Wine installation updated through the WineHQ repository to benefit from these improvements.
Alright, you’re ready to start installing and running Windows applications on Linux Mint. Whether you need to run specific Windows software for work, play classic games, or just experiment with compatibility, you now have the foundation for success.
![]()